Set up the LogMeIn Resolve app in ConnectWise
LogMeIn Resolve offers your agents the option to start remote control sessions with your end-users, directly from ConnectWise.
Before you begin: The following requirements must be met to use
LogMeIn Resolve in ConnectWise:
- Your end-users and agents must meet the minimum system requirements.
- A ConnectWise Administrator at your organization should first install the LogMeIn Resolve app to ConnectWise for your Agents. Contact your Success Manager to get the LogMeIn Resolve app.
- Agents should have a LogMeIn Resolve account with Remote Support capability. You can set up agents in GoTo Admin.
Here's how to add the
LogMeIn Resolve app to ConnectWise as a pod and enable time entry creation for your agents.
Display the LogMeIn Resolve app in ConnectWise as a pod
ConnectWise admins can configure a pod with the integration on any instance.
Create public and private keys for ticket automation
Results: If you do not see the Members option under the System module, please confirm that you are a Full Admin in the PSA instance.
Synchronize tenants and import devices from LogMeIn Resolve
You can manage your LogMeIn Resolve devices and tenants directly in ConnectWise. A tenant is called a company in ConnectWise.
Before you begin: Make sure your ConnectWise and
LogMeIn Resolve accounts are linked and the GoTo Resolve app is displayed as a pod as described in
Display the LogMeIn Resolve app in ConnectWise as a pod.
What to do next: After linking your
LogMeIn Resolve devices to your ConnectWise account, you can
start remote support sessions,
view alerts, and create automatic Helpdesk tickets.
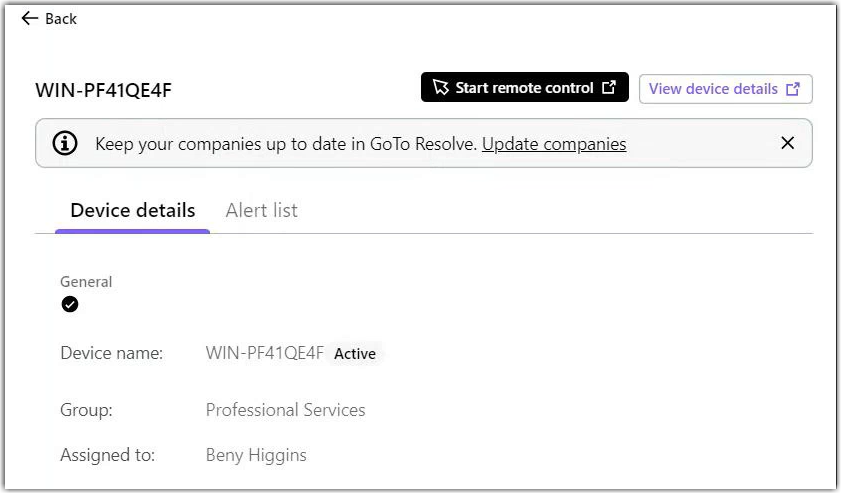
Important: When a tenant is added or modified in LogMeIn Resolve, you must manually update your ConnectWise integration to sync your tenants. To do so, select the Update companies link in the Resolve pod in ConnectWise as displayed above.
Enable time entry creation in the LogMeIn Resolve app
To allow agents to create time entries from the LogMeIn Resolve app, the admin of the ConnectWise instance must set up expense report periods. If an agent tries to create a time entry without that setup, an error will be displayed. To set up expense report periods, do the following:
- Go to the menu.
- In the Table column, search for Time period and select that item.
- Create a new time period with the following settings:
- Period for: Select Time and Expense
- Year: Type the current year
- End of First Period: Select the last business day of January from the calendar
- Save your configuration at the top of the page.
Article last updated: 1 April, 2025


