
How to Configure Privacy Control Settings
Protect your customers' privacy and sensitive data by configuring button blocking and data masking on co-browsed websites using a convenient visual setup tool that does not require you to have advanced web developer skills (such as working with CSS selectors).
- Button Blocking
- Button blocking prevents the agent from clicking certain critical buttons on the co-browsed website. For example, you can block the agent from being able to actually submit a form or initiate an online purchase on behalf of the customer.
- Data Masking
- Data masking hides the customer's sensitive data in specific fields of a web page (such as, credit card number, CVV code, etc.). When the customer is editing information in such a field, the session gets paused on the agent's side, and resumes when the customer clicks out of that field.
- Configure the website where you want to set up privacy control.
- Log in to the Rescue Live Admin Center.
- Click the Live Guide tab.
- Navigate to the Privacy Control Settings section.
- To configure button blocking and/or data masking on a new site, click Add a site.
 Note: If you want to edit privacy control settings for a website you have already configured, go to Step 2.
 - In the URL field, enter the URL of the website where you want to configure privacy control settings.
Important: Once you finish the privacy control setup, this field will be read-only. To change it, you will have to use the Visual Editor as described below. - Use the Rescue Live Guide Visual Editor to set up element blocking/masking.
- Next to the URL field, click Open Visual Editor.

Result: The website is opened in a new browser tab.
Tip: You can edit the URL of the website in this tab and navigate to any page on this website.Note: Depending on where you are in the setup process, you will be accessing the selected website either in navigation mode or setup mode.- Navigation Mode
- You can navigate on the website just like you would if you were browsing it normally. You can, for example, accept cookie policies or navigate to a specific sub-page before you start setting up button blocking or data masking.
- Setup Mode
-
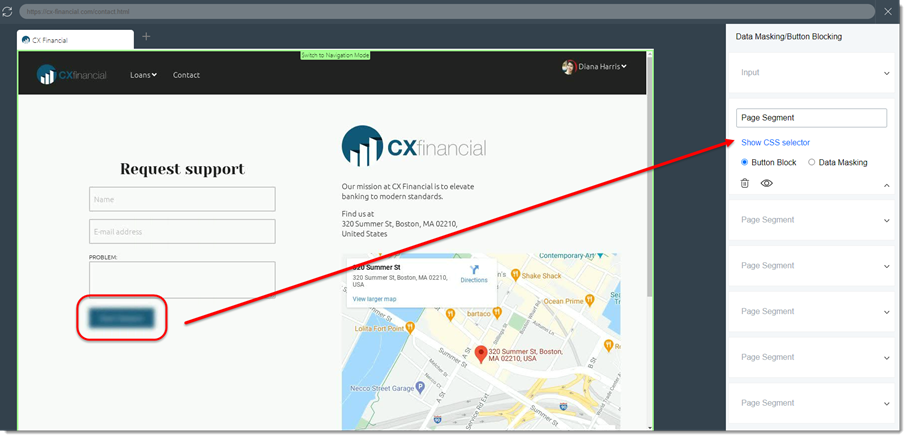
When you have entered setup mode, clicking on any element will select it for button blocking or data masking. A green frame around the browser tab indicates setup mode.

To return to navigation mode, click Switch to Navigation Mode. Your changes will NOT be lost.
- Make sure you are on the page where you want to configure privacy control, then in the bottom-right corner of the tab, click Start Privacy Control Setup.
Result: Navigation mode ends, and you enter setup mode.
- Select the HTML element you want to protect (for example, a button or a data field).
Result: The selected element is listed on the Data Masking/Button Blocking panel on the right side of the tab.
 Tip: You can edit the name of the element.
 - Depending on which type of privacy control you want to apply to the element, make sure Button Block or Data Masking is selected.
Note: You can set up button blocking/data masking for only one element at a time. To configure more elements, repeat the process.Note: A data entry field set up for data masking appears as blurred, while a button that is blocked is surrounded by a red frame.

- In the bottom-right corner of the tab, click Next.
Result: The URL scope selector is displayed.
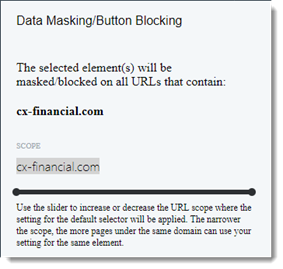
- Use the slider to set the URL/domain scope where you want the selected element(s) to be blocked/masked. The narrower the scope, the more pages under the same domain can use your privacy control settings for the same element.
Example: Your website (www.exampleinsurancecompany.com) offers insurance for homes, cars, and traveling. These are available on three separate pages.
- www.exampleinsurancecompany.com/homes
- www.exampleinsurancecompany.com/cars
- www.exampleinsurancecompany.com/travel
 If you leave the scope like this, the same Buy Now button will not be blocked on the car and travel insurance pages. However, if you narrow down the scope to www.exampleinsurancecompany.com, the Buy Now button will be blocked on all three pages.
 Important: This only works if the HTML element ID is the same for the elements (in this example, the Buy Now buttons) on all the pages.
 - In the bottom-right corner of the tab, click Apply changes.
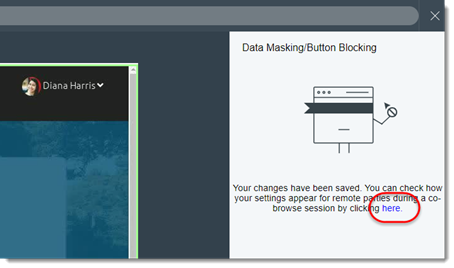
Result: You can check how your settings appear for remote parties during a co-browse session by clicking the here link on the side panel.
- To complete the privacy control setup, click Finish in the bottom-right corner of the tab.
- Next to the URL field, click Open Visual Editor.