Task 3: Configure a Technician User
This section configures a user to have access to the LogMeIn Rescue application.
Task 3.1: Add Permission Sets to a User
You can learn from this article how to add permission sets to a user.
Note: The information below pertains to Salesforce Lightning Experience users
- Navigate to
- Select the appropriate Permission Set for LogMeIn Rescue from the two available options:
- Rescue Admin Permission Set: Provides the functionality needed for a Rescue admin. Access to see and modify the Rescue Settings object.
- Rescue Integration Permissions: Provides the functionality needed for any Rescue user. PIN generation and access to Case, Rescue Log and Rescue Session objects.
- Assign the Permission Set to a User or list of Users.
- Select Save.
Configure your Email Template
Task 3.2: Import data
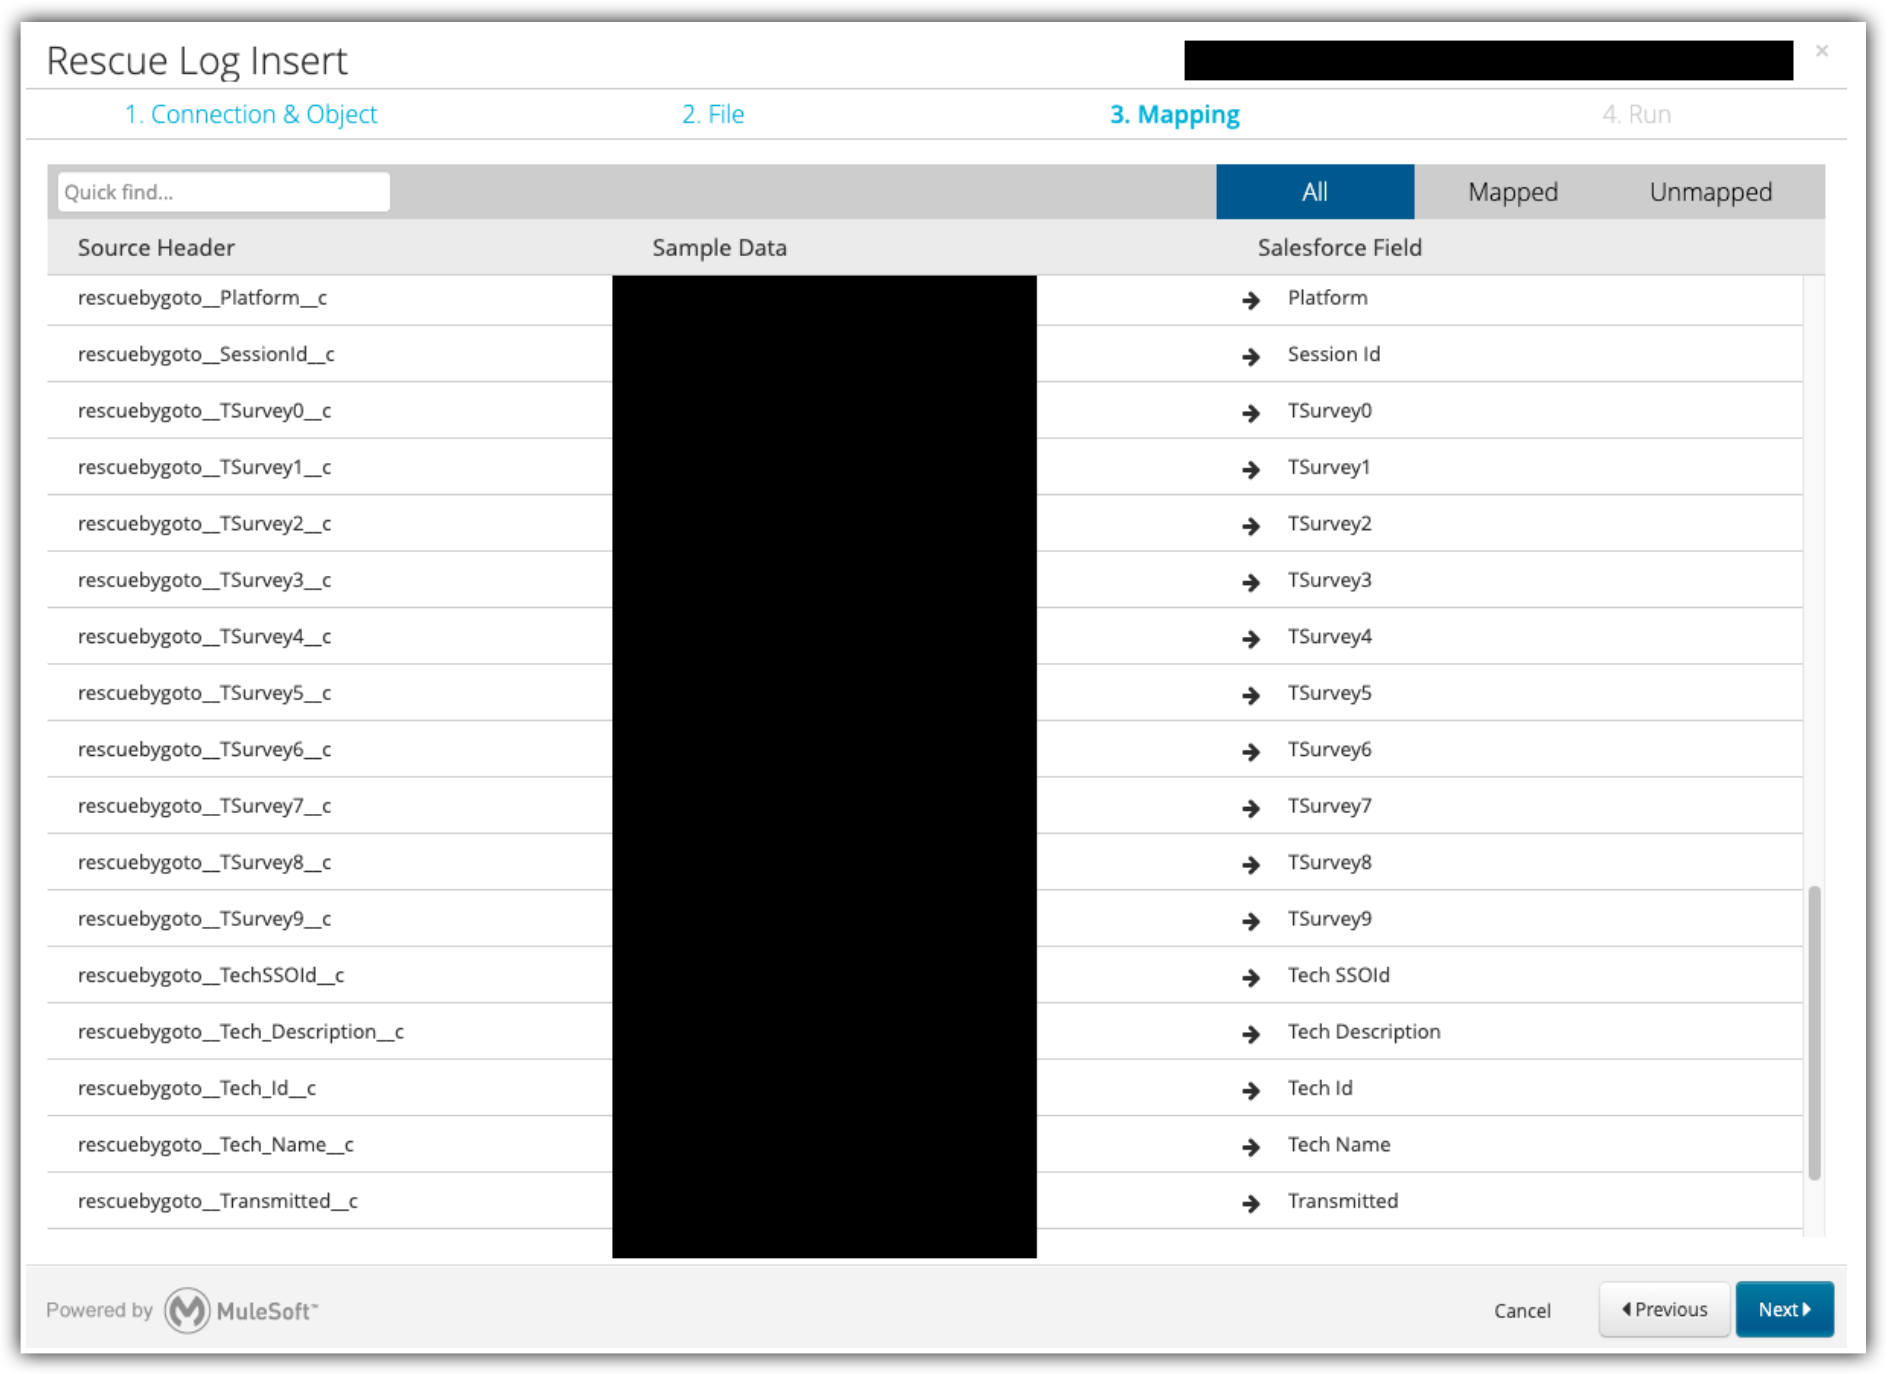
If you had an older version of the package, you should have your Rescue Session and Rescue Logs data backed up. Now, you can import it again.
Pre-steps: Verify date/time format
Before you begin: Before inserting the data, ensure that the date/time format in your CSV file is correct. It should match Salesforce’s required structure (e.g., YYYY-MM-DDTHH:MM:SSZ or YYYY-MM-DDTHH:MM:SS-08:00 for PST).
Verify that all date/time values are properly formatted before proceeding.
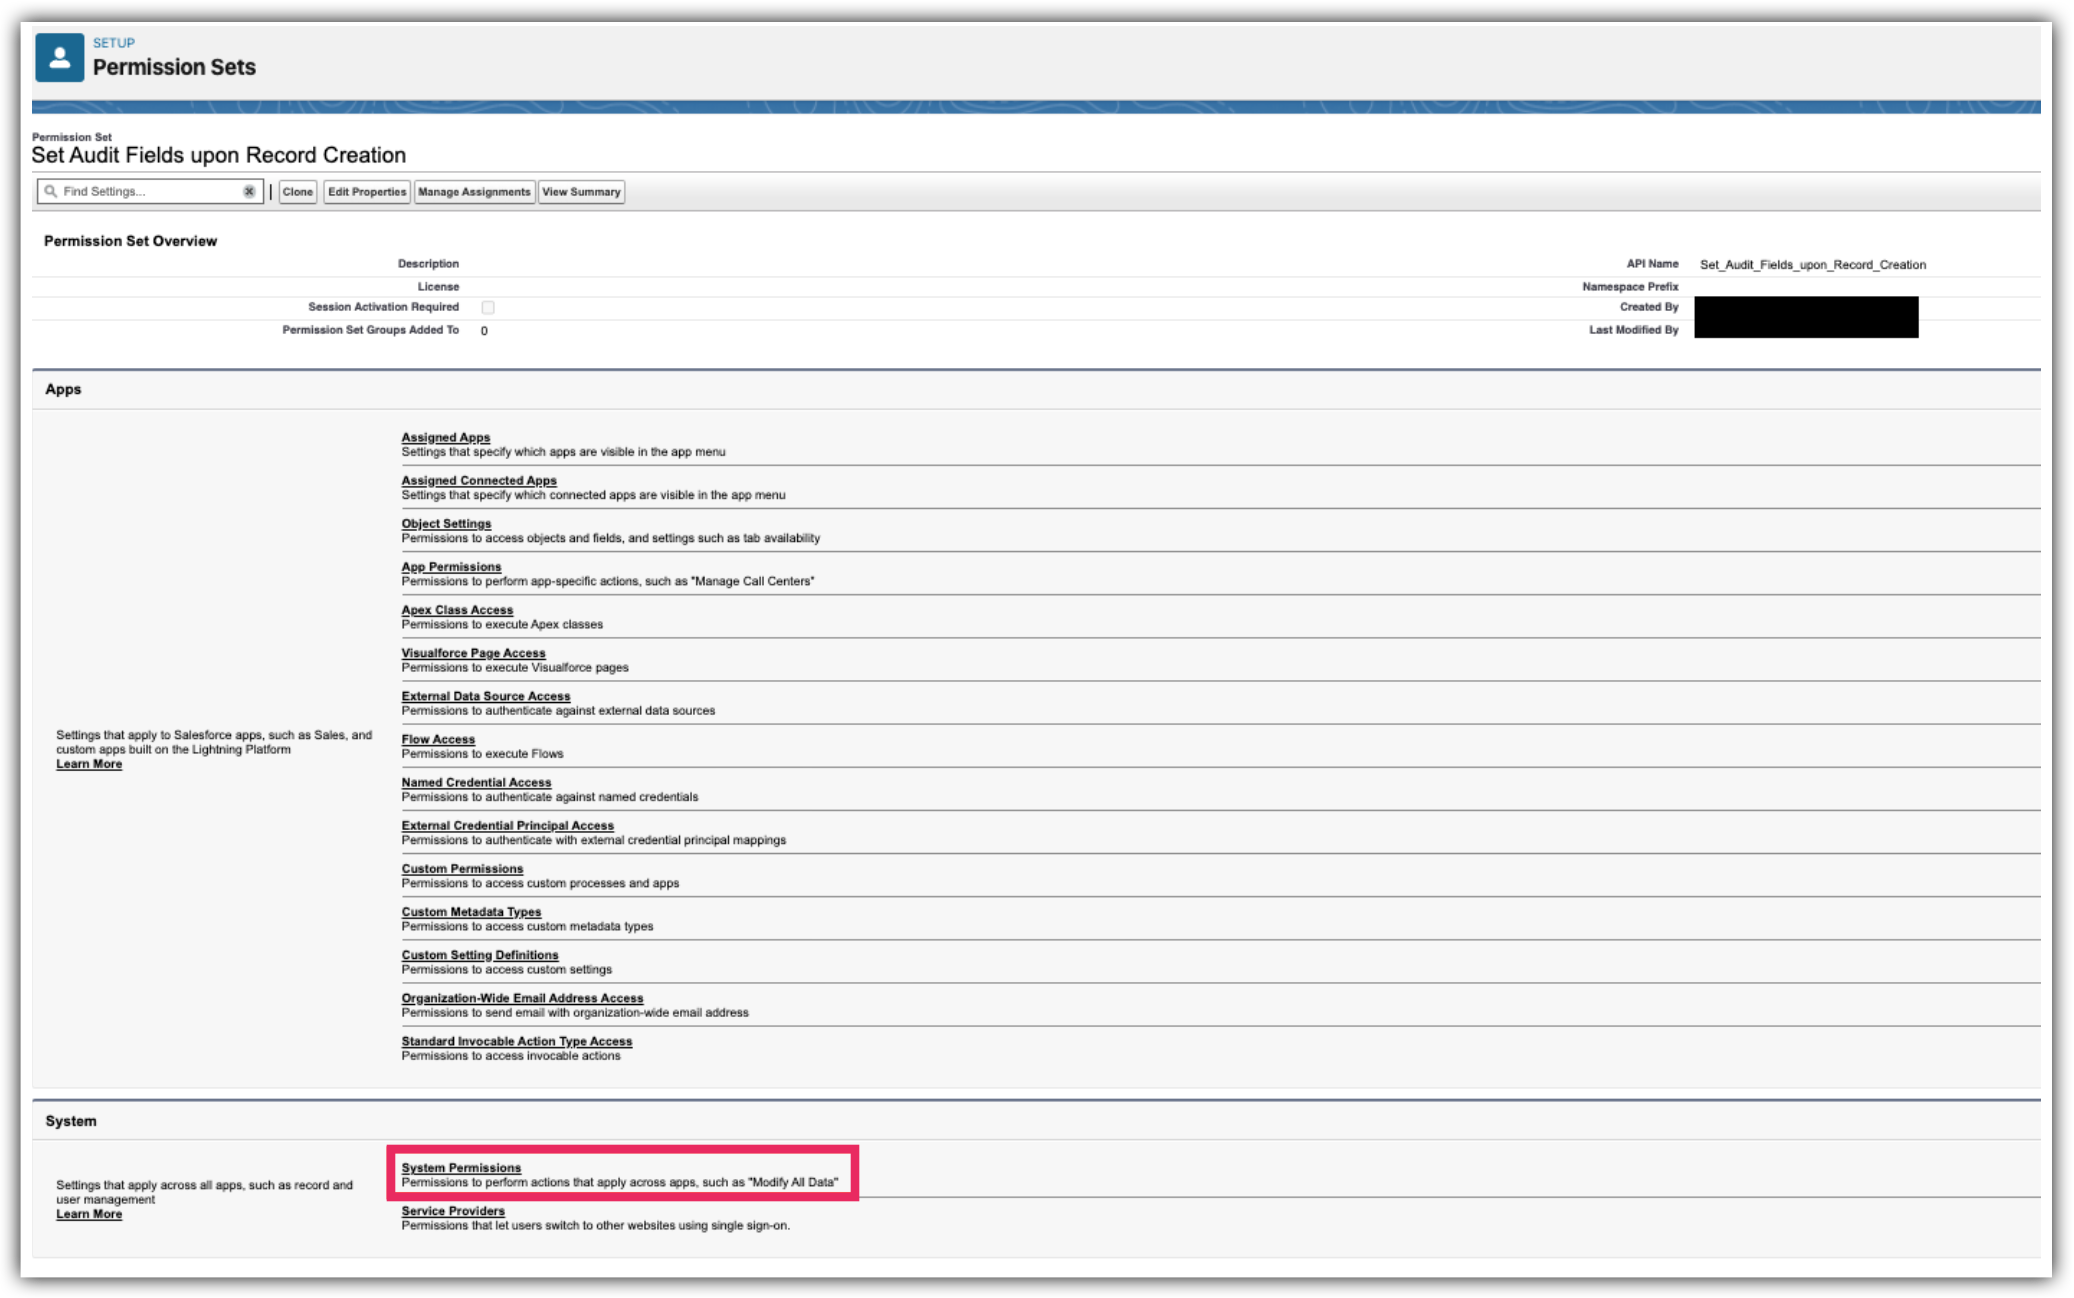
Create a new Custom Permission Set
Before you begin: To enable file import functionality for users (System Administrators) and include the
Created Date and
Last Modified By fields, a new custom permission set must be created.
Import your data
Parent article:
About the LogMeIn Rescue Salesforce Integration
Previous article:
Task 2: Set up Your Initial Configuration
Article last updated: 6 March, 2025


