Getting Started: Set up device groups
Device groups allow you to manage devices that share similar attributes. You will need your signature key to create a device group, to add devices to a device group, and to move devices from a device group to another.
Verifying your devices
When you add a new device to your device list it appears in the
Unverified devices list. You will see the details of the device but you cannot start a remote support session, launch terminal or the file manager on it, unless you verify it. When you verify a new device, you not only have full control over it, but extend the protective shield via your signature key to device management as well.
- Select a device or a set of devices from the Unverified devices list.
Tip: By clicking the top row of the Unverified devices list you can select every device in the list and verify them all, by selecting Verify all. You can verify up to 500 devices at one go.
- Select Verify.
- Enter your signature key to proceed.
- The selected device(s) will appear in the Not in a group list.
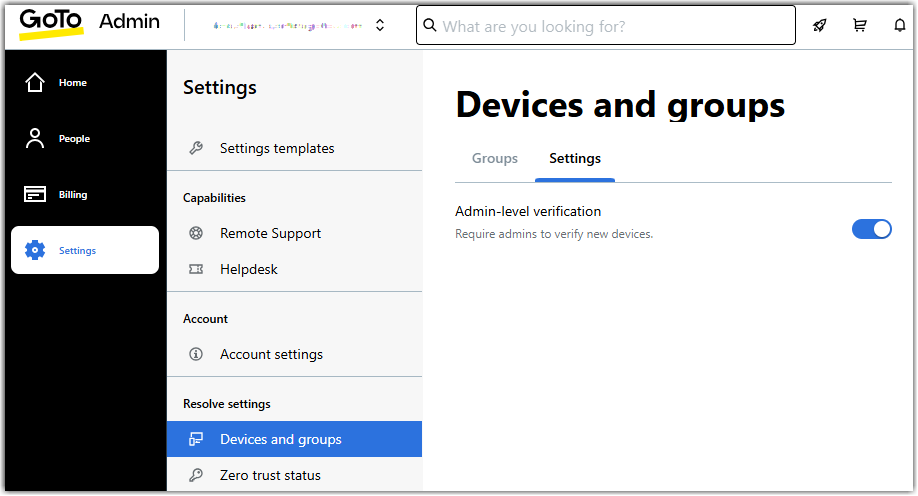
Tip: If Admin-level verification is enabled on your account, agents can add new devices, but only admins can verify them. To find this setting in GoTo Admin, go to and navigate to the Settings tab.


Creating new device groups
By default all your verified devices are shown in the
All devices list. You can organize your devices into specific device groups, for example setting up a group each for your home and office computers. To do so:
- On the Devices page select Create new group in the top-right corner.
- Enter the name of the group and select Save.
- Enter your signature key and select Proceed.
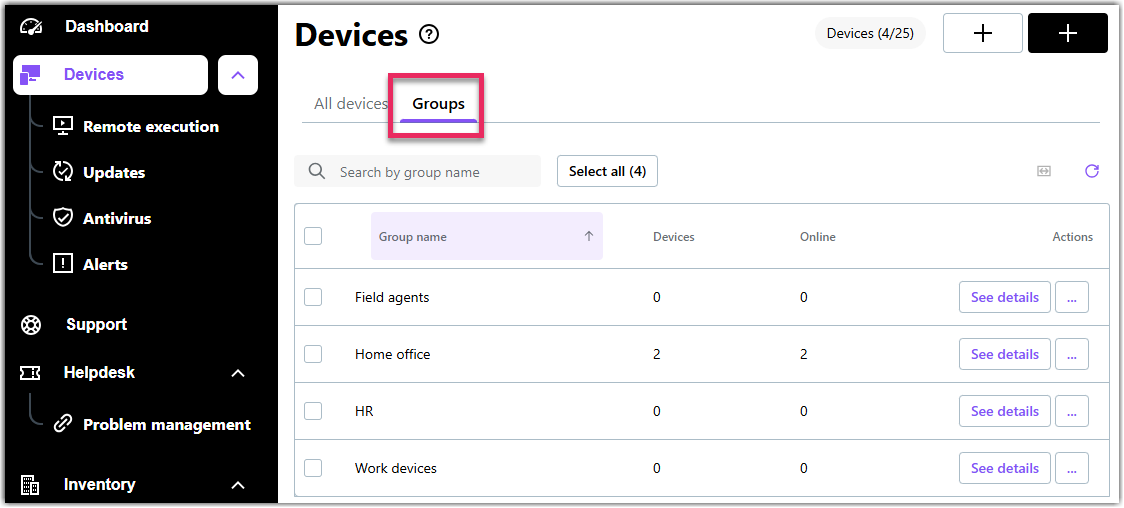
Your new group is listed on the Groups tab of the Devices page.

- Optionally, open the Actions menu on the right of the group and select Assign agents to assign agents to the group. You will be redirected to GoTo Admin.
Moving devices to your groups
- Select a device or set of devices in the All devices list.
- Scroll down to Group in the Manage device panel that pops up on the right of the Console.
- Select Group and select the device group you want to add your devices to.
- Select Done.
- Enter your signature key and select Proceed.
- Your devices appear in the group you selected in the Device groups list.
Note: You can move a device to another group by selecting them and clicking Manage in their actual device group, and repeating the steps above.
Managing device groups
You can manage your device groups from the
Manage groups list:
- Hover your mouse over a device group and select the pencil icon on the right to edit its name.
- Hover your mouse over a device group and select the bin icon to delete it.
- Select Assign agents to assign agents or remove them from a group in GoTo Admin.
Note: You have to enter your signature key to implement the changes.
Parent article:
Getting Started with LogMeIn Resolve
Previous article:
Getting Started: Add devices
Next article:
Getting Started: Remote support from the Devices page
Article last updated: 15 November, 2022
You are viewing the latest version of this article.
